


TIPS FOR LAYOUT PHOTOGRAPHY
What you will need
With modern digital cameras, layout photography is easier than ever, but there are still some essential basics that you need to know to get the very best images, especially if you want to publish them in a magazine or online. You will need a digital camera and a separate tripod. The camera will need:
- Adjustable shooting modes on a dial (Auto, P, A, S, M etc.)
- Adjustable white light balance
- Auto focus facility
- Self-timer
- Tripod mounting screw
- Viewing screen for live-view composition (although normal viewfinders can be used)
Also ensure that the camera image resolution is set to maximum.
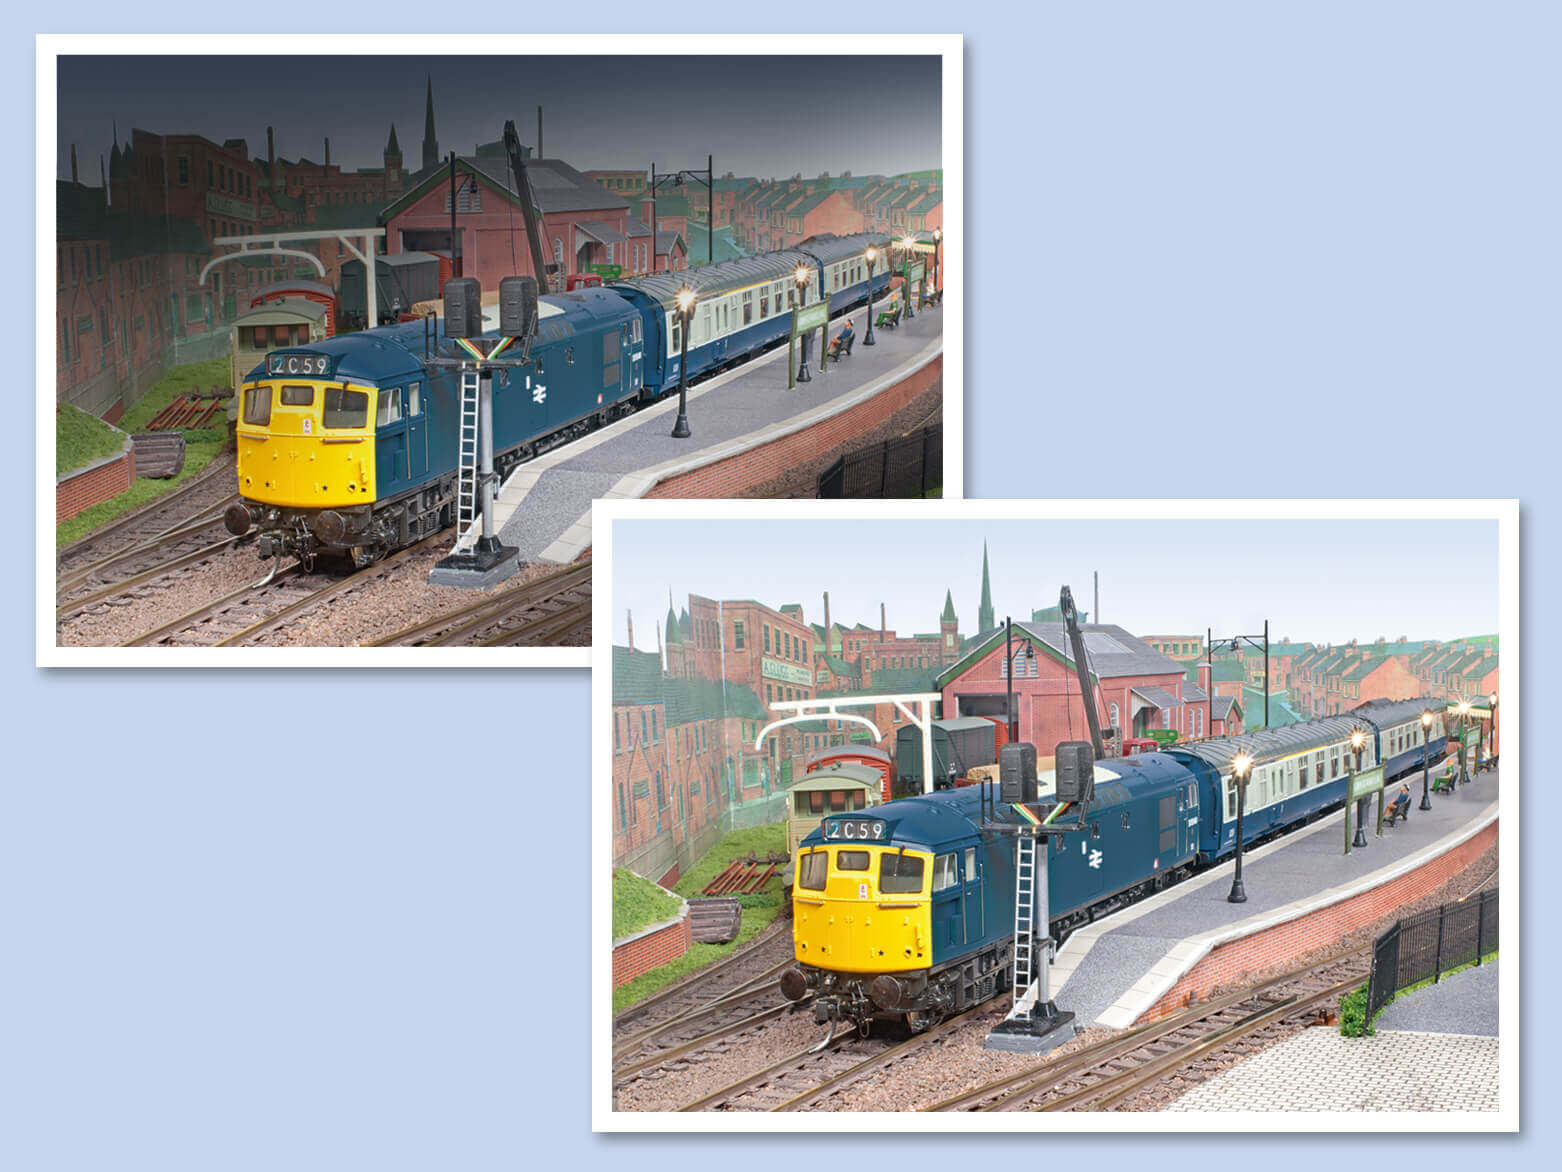
Getting as much even lighting on the subject as possible
If the layout is portable, take it outside on a bright but slightly overcast day. Direct sunshine can create heavy or dense shadows, so it is best avoided. If the layout is permanently housed in a room without its own lighting, then you need to find ways to maximise the available light. Purpose-made photographic lights can be used but are expensive, so consider using portable workshop lights, as sold by Screwfix and other DIY outlets. These can be up to 1000 watts and, if need be, directed at the ceiling to bounce the light back and create even illumination. Naturally, as these are designed primarily for garage or workshop use, care must be observed and the manufacturer's safety guidelines observed. If such portable lighting is not an option, then use maximum power bulbs in the room lighting fixtures and introduce portable lighting fixtures (lamp standards, angle poise etc.).
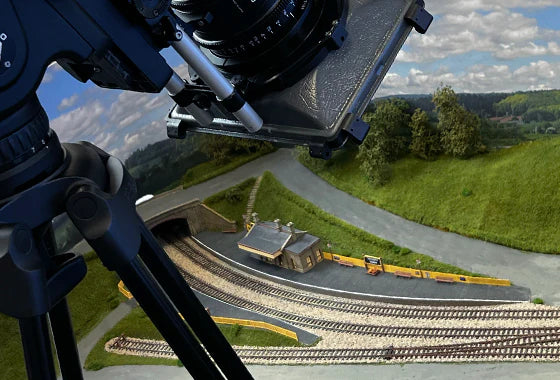
Getting maximum depth of field
To ensure as much of the picture is in focus as possible, set the shooting mode to A (aperture priority), then set the aperture to the maximum f number (smallest aperture). Depending on the camera, this might be f8, f16, f22 or an even higher number. In aperture priority mode, the camera will automatically determine the exposure time. Usually, with indoor lighting, this might be anything between 1/10 of a second and 15 seconds, depending on the amount of illumination. Obviously, as it is impossible to hold a camera steady for these exposure times, the camera must be mounted on a tripod during the exposure. Compose the picture by adjusting its position on the tripod. Let the autofocus facility focus the lens - this usually selects the optimum focus for the picture. Then, use the self-timer facility (set to a maximum of 10 seconds) when you press the shutter - this ensures any vibrations you may cause when pressing the shutter die down before the camera makes the exposure.
Getting the correct colour balance in the picture
To do this, use the white balance adjustment on the camera. The easiest way is probably to set it to auto white balance (AWB) mode, though more accurate colour balance can sometimes be achieved by setting the white balance to match the illumination source (i.e. sunshine, daylight, tungsten, fluorescent, etc.).
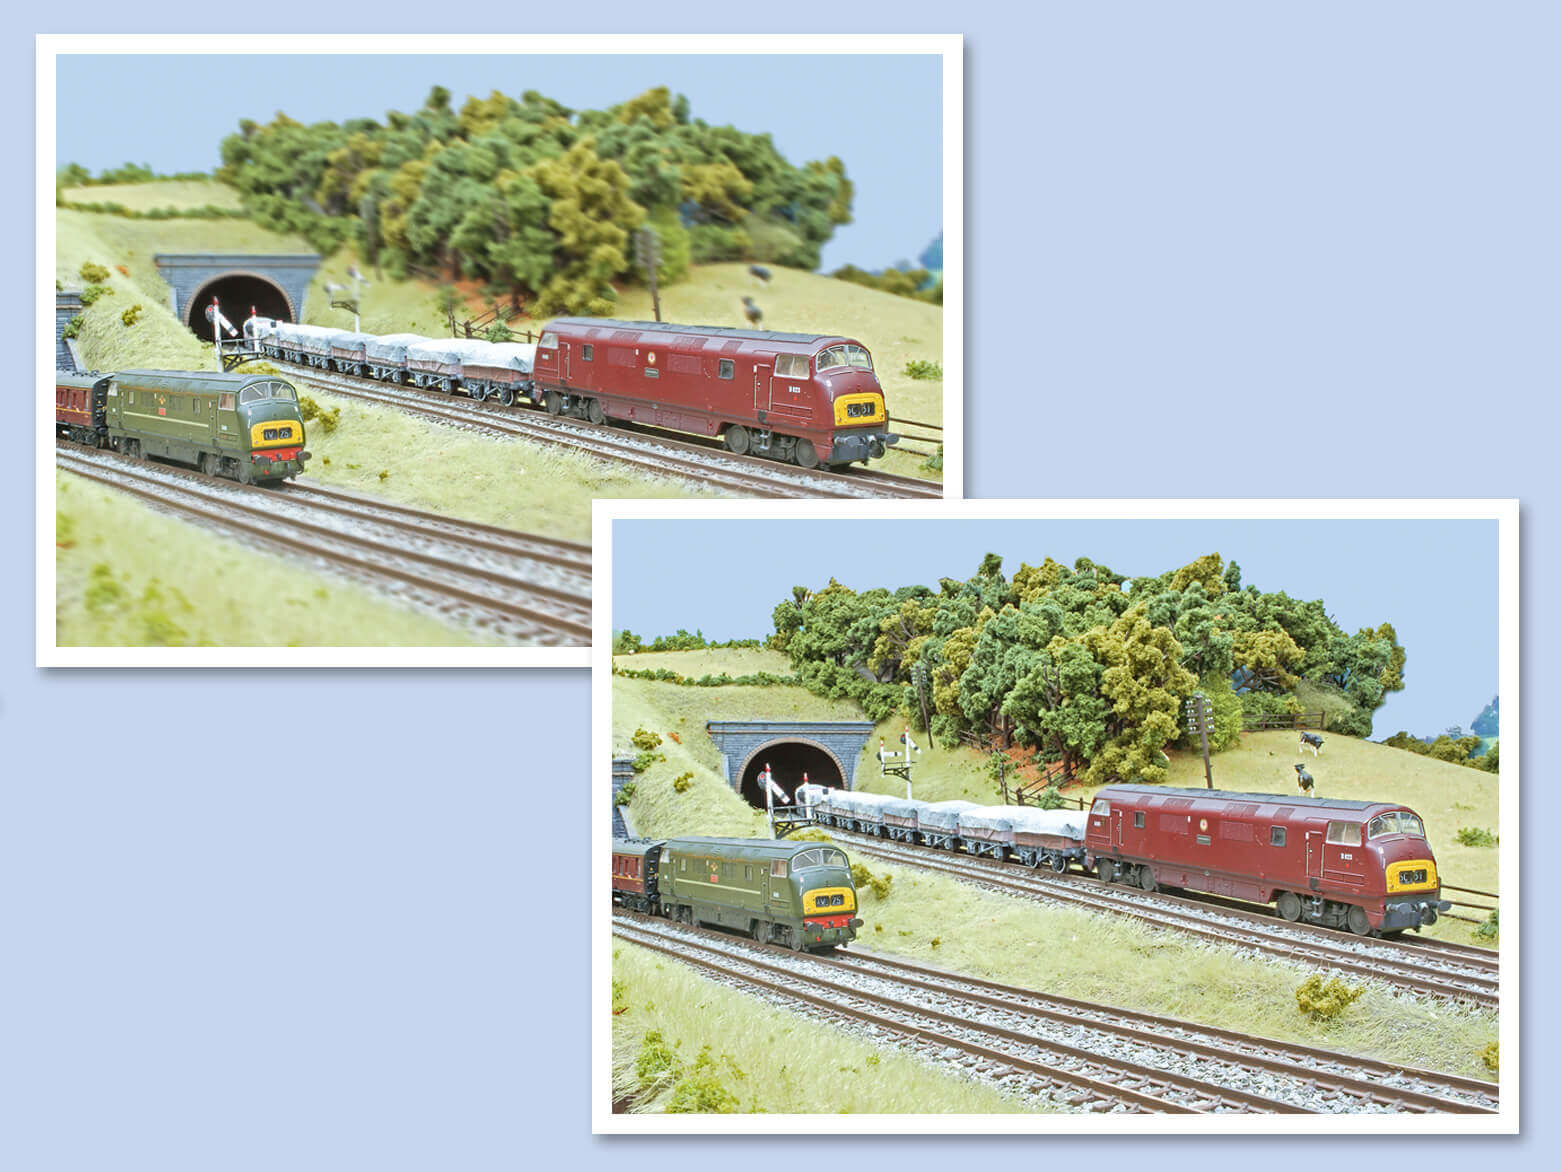
Avoiding certain elements of the scene clashing with others
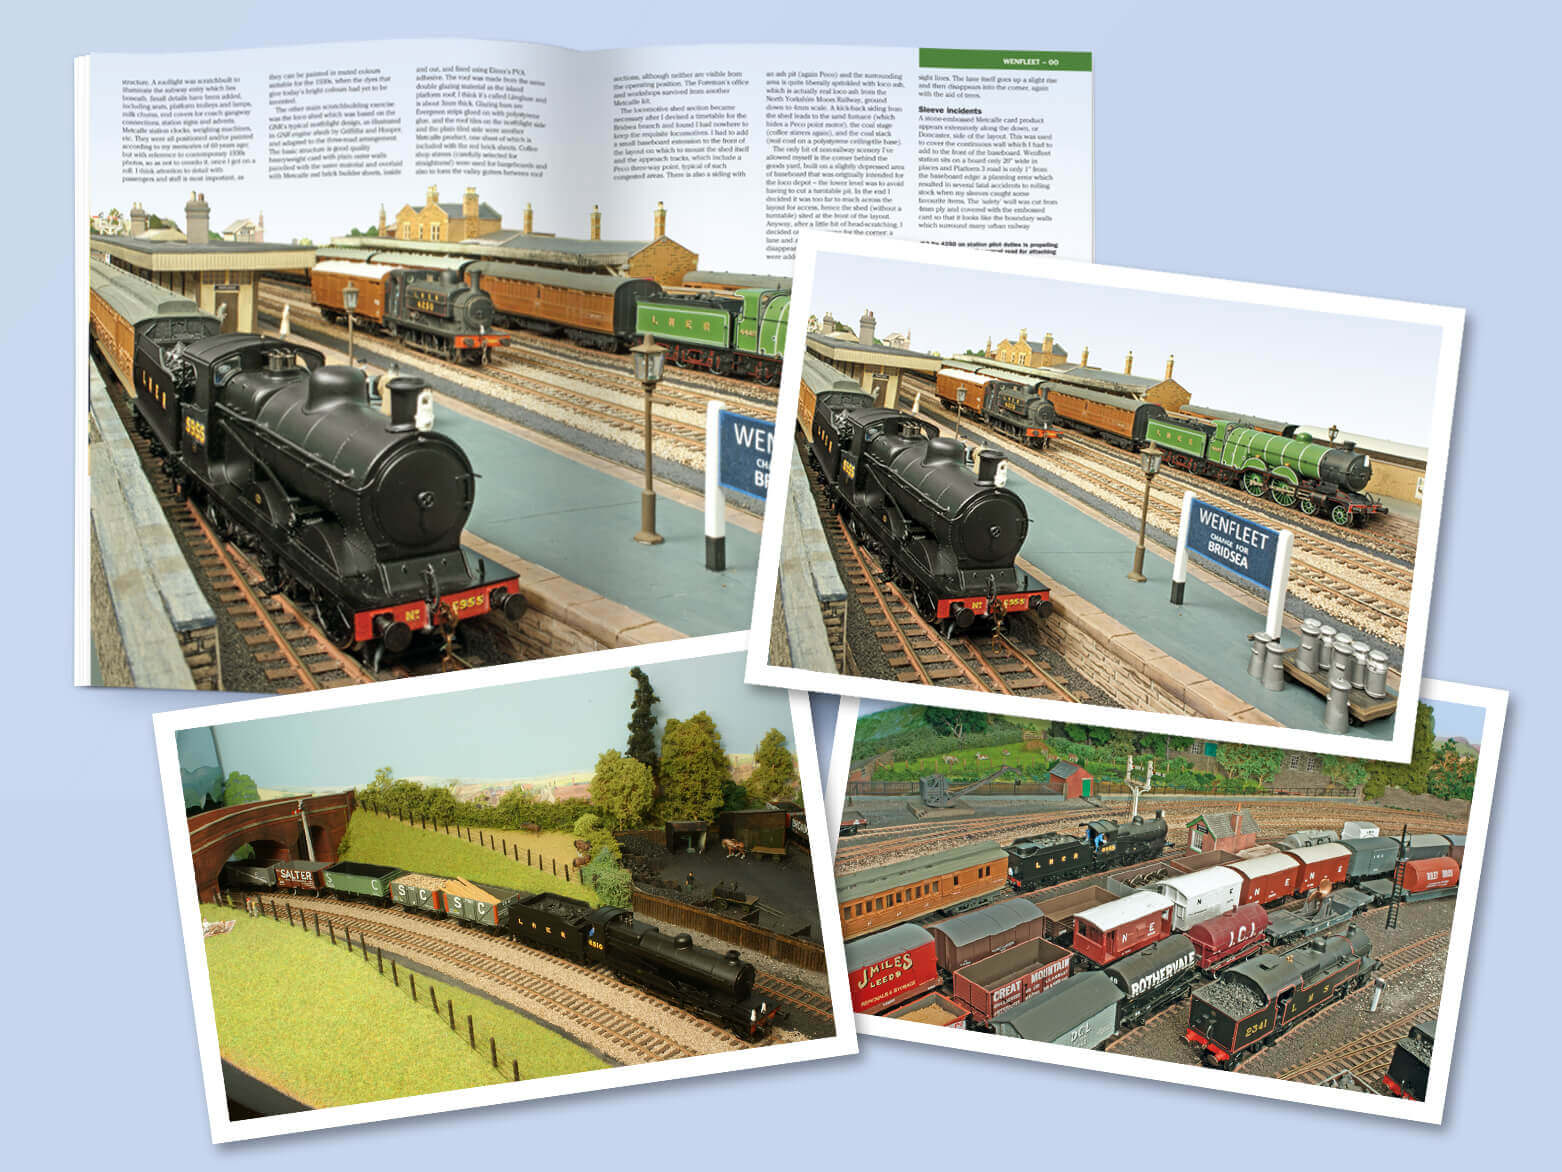
This is a matter of composition and is of course subjective, but it is mostly about positioning stock on the layout so that they form a pleasing composition. Avoid situations where signals obscure the front of the loco, or where signals are immediately behind the front of the loco and appear to ‘grow’ out of the loco chimney.
Getting your pictures published
Download the photos as jpg files and send them in that format by email - we can take it from there.
These notes are meant as a guide only and do not guarantee results. Observe manufacturers' operating instructions on all equipment being used. It is the user's responsibility to ensure his or her own safety and no liability will be accepted for any incident occurring whilst following these guidelines.